DIY “Antiqued” Map

Standard
DIY “Antiqued” Map

For some reason, I have found myself falling absolutely in love with all things rustic, antique, and industrial.  Am I getting old?  Or maybe just (finally) gaining some maturity?  Don’t answer that.  Anywhoo, during my (waayy too many) Pinterest scouring sessions, I kept seeing these amazing antique looking maps.  I began to feel kinda like that spoiled brat girl in the Johnny Depp version of Charlie & the Chocolate Factory – “I want one, Daddy!”  The problem was the price.  As much as I was loving the maps, I was NOT loving the prices!  With three active teens and only one “real” income, we just don’t have the cash lying around for a map to hang on the wall.  So, I just figured out a way to make my own.  For about $6.  Yes!

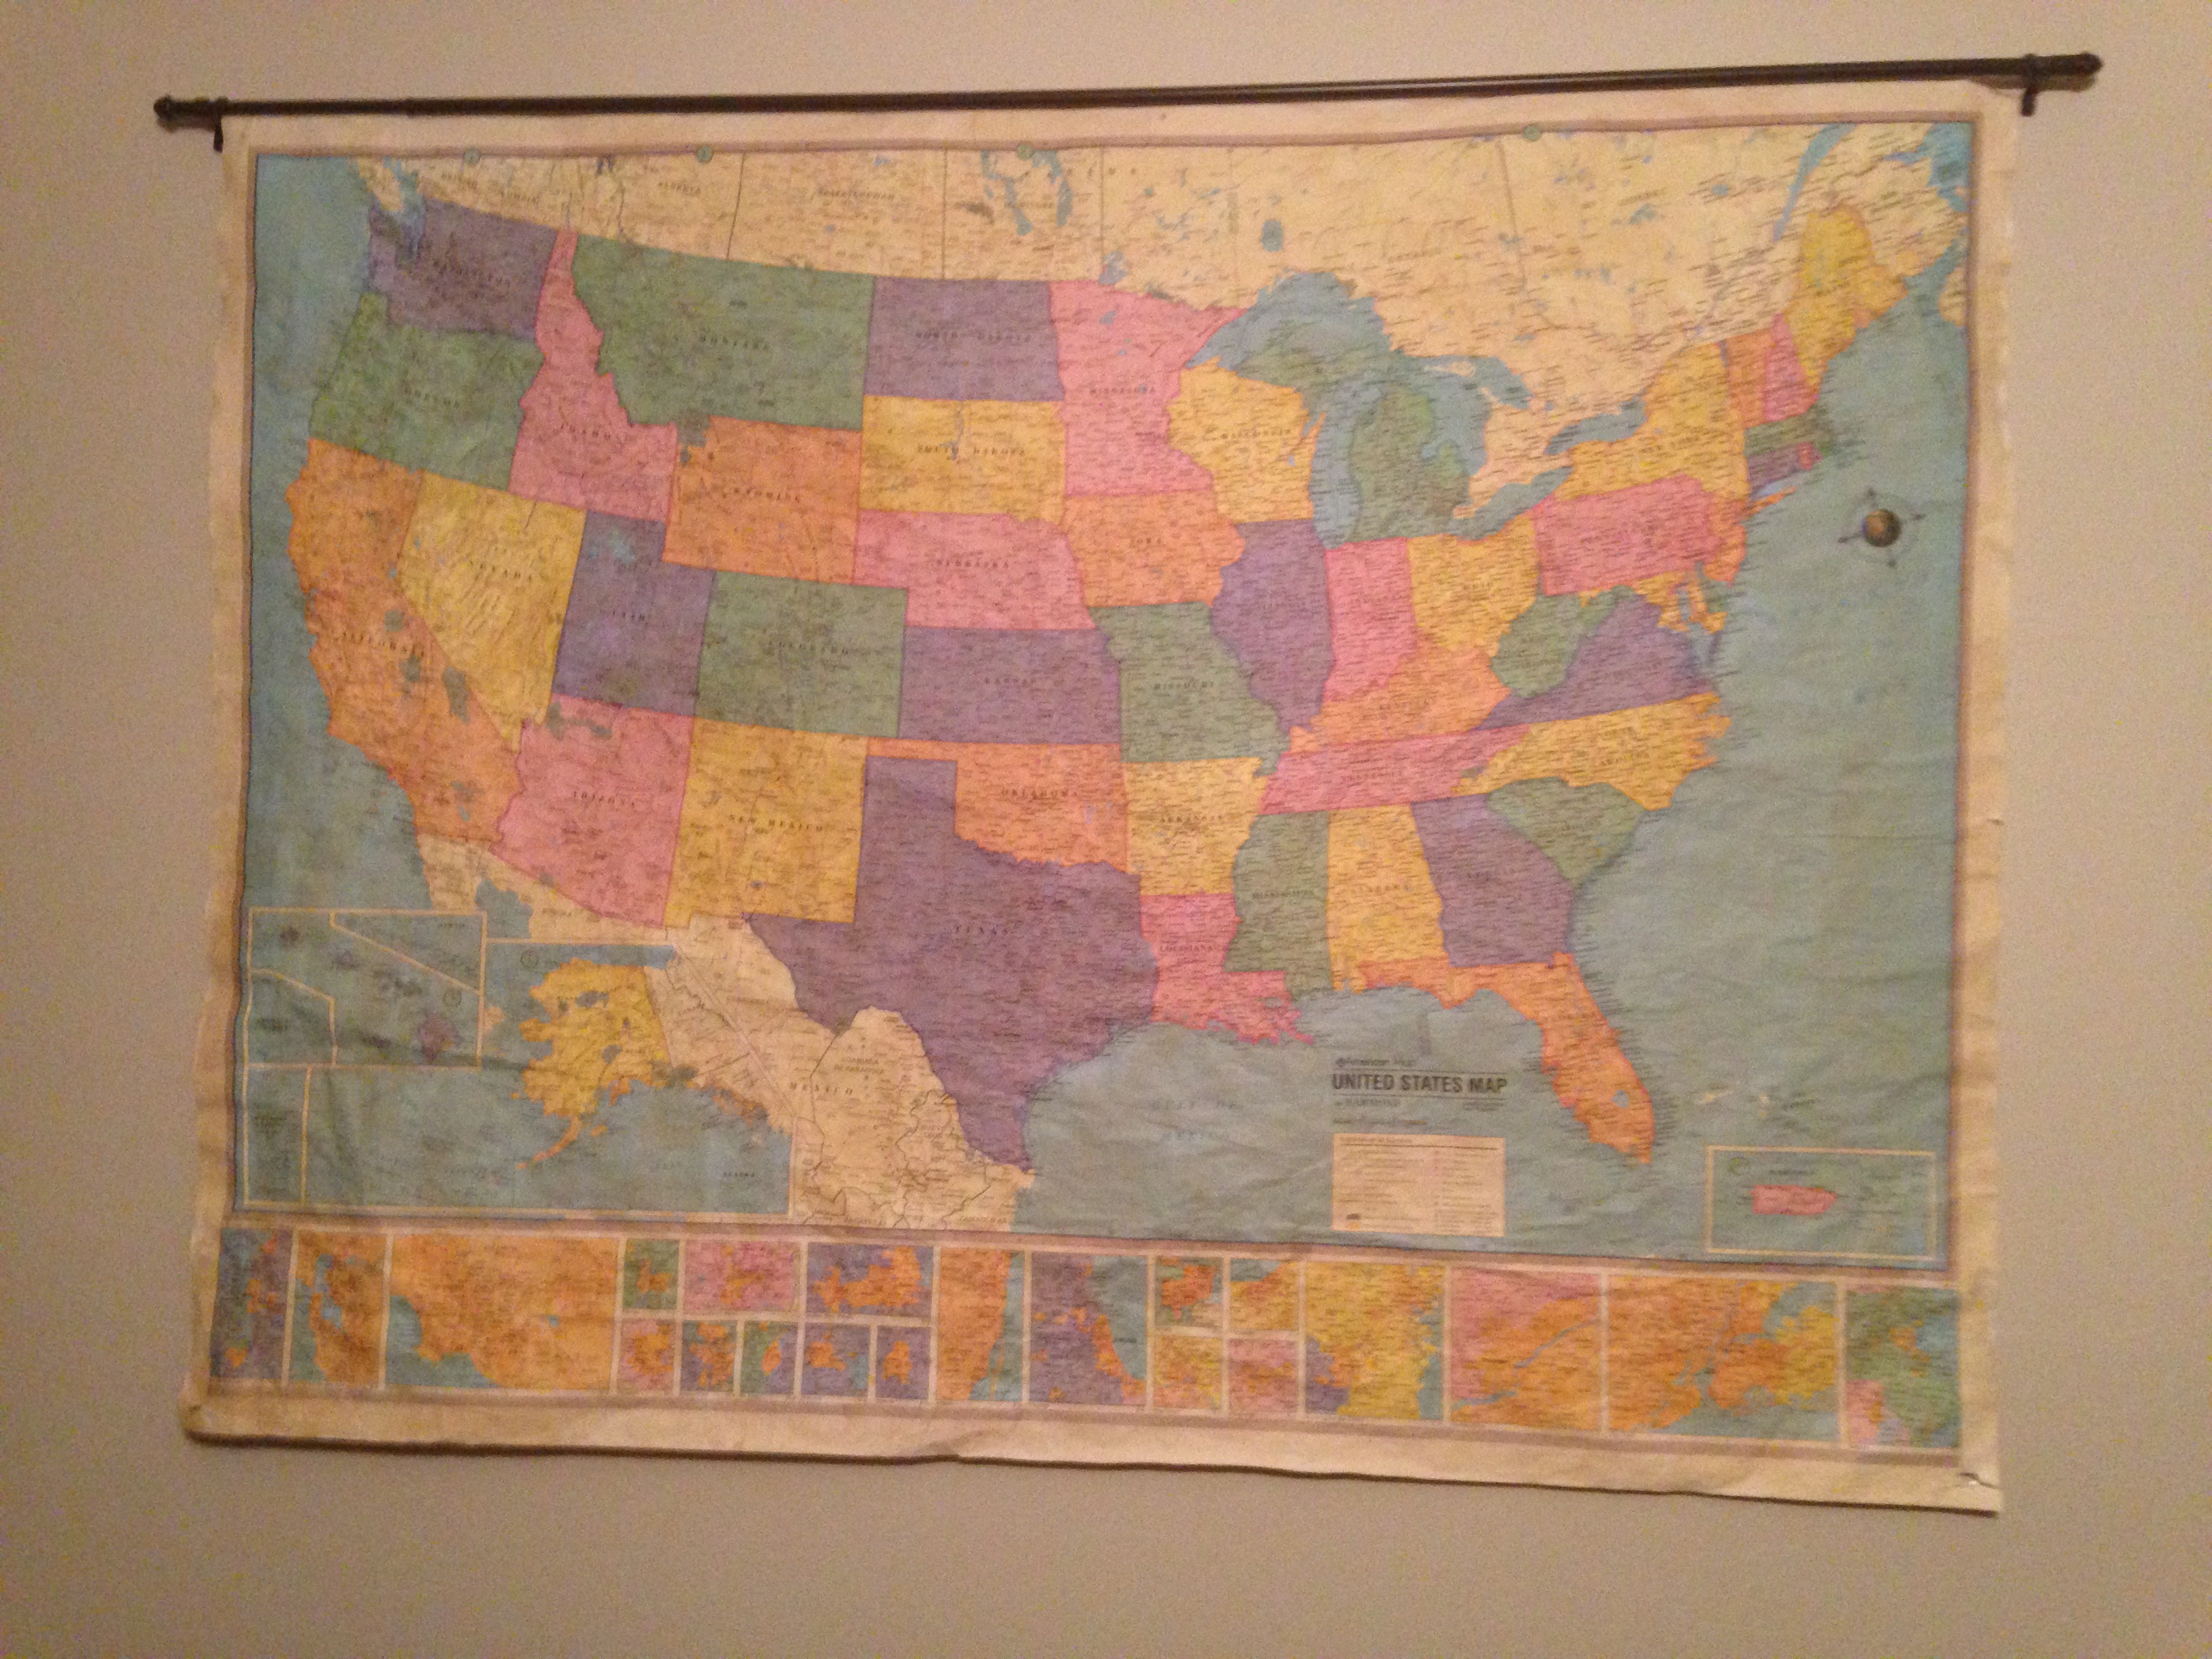
We had a couple of large (49×37) paper maps that were once in the kids’ playroom, back when they were learning states and countries in school.  They probably came from Wal-Mart.  The problem was that they were brightly colored & I wanted more of an antique look.  So, off to Pinterest I went in search of a way to make them look more antique…on a budget….and fast.  Nothing like immediate gratification!


I found tutorials for antiquing paper with tea and/or coffee and figured I couldn’t mess that up too badly.  It was SO easy!  I just took a couple of tea bags and dropped them in 1/2 a mug of hot water.  Once the tea appeared dark enough, I removed the tea bags.  (Actually, I started out rubbing the actual tea bags across the map, but got worried that the little bag would bust and leave tea leaves all over the map.)

IMG_5034  IMG_5035

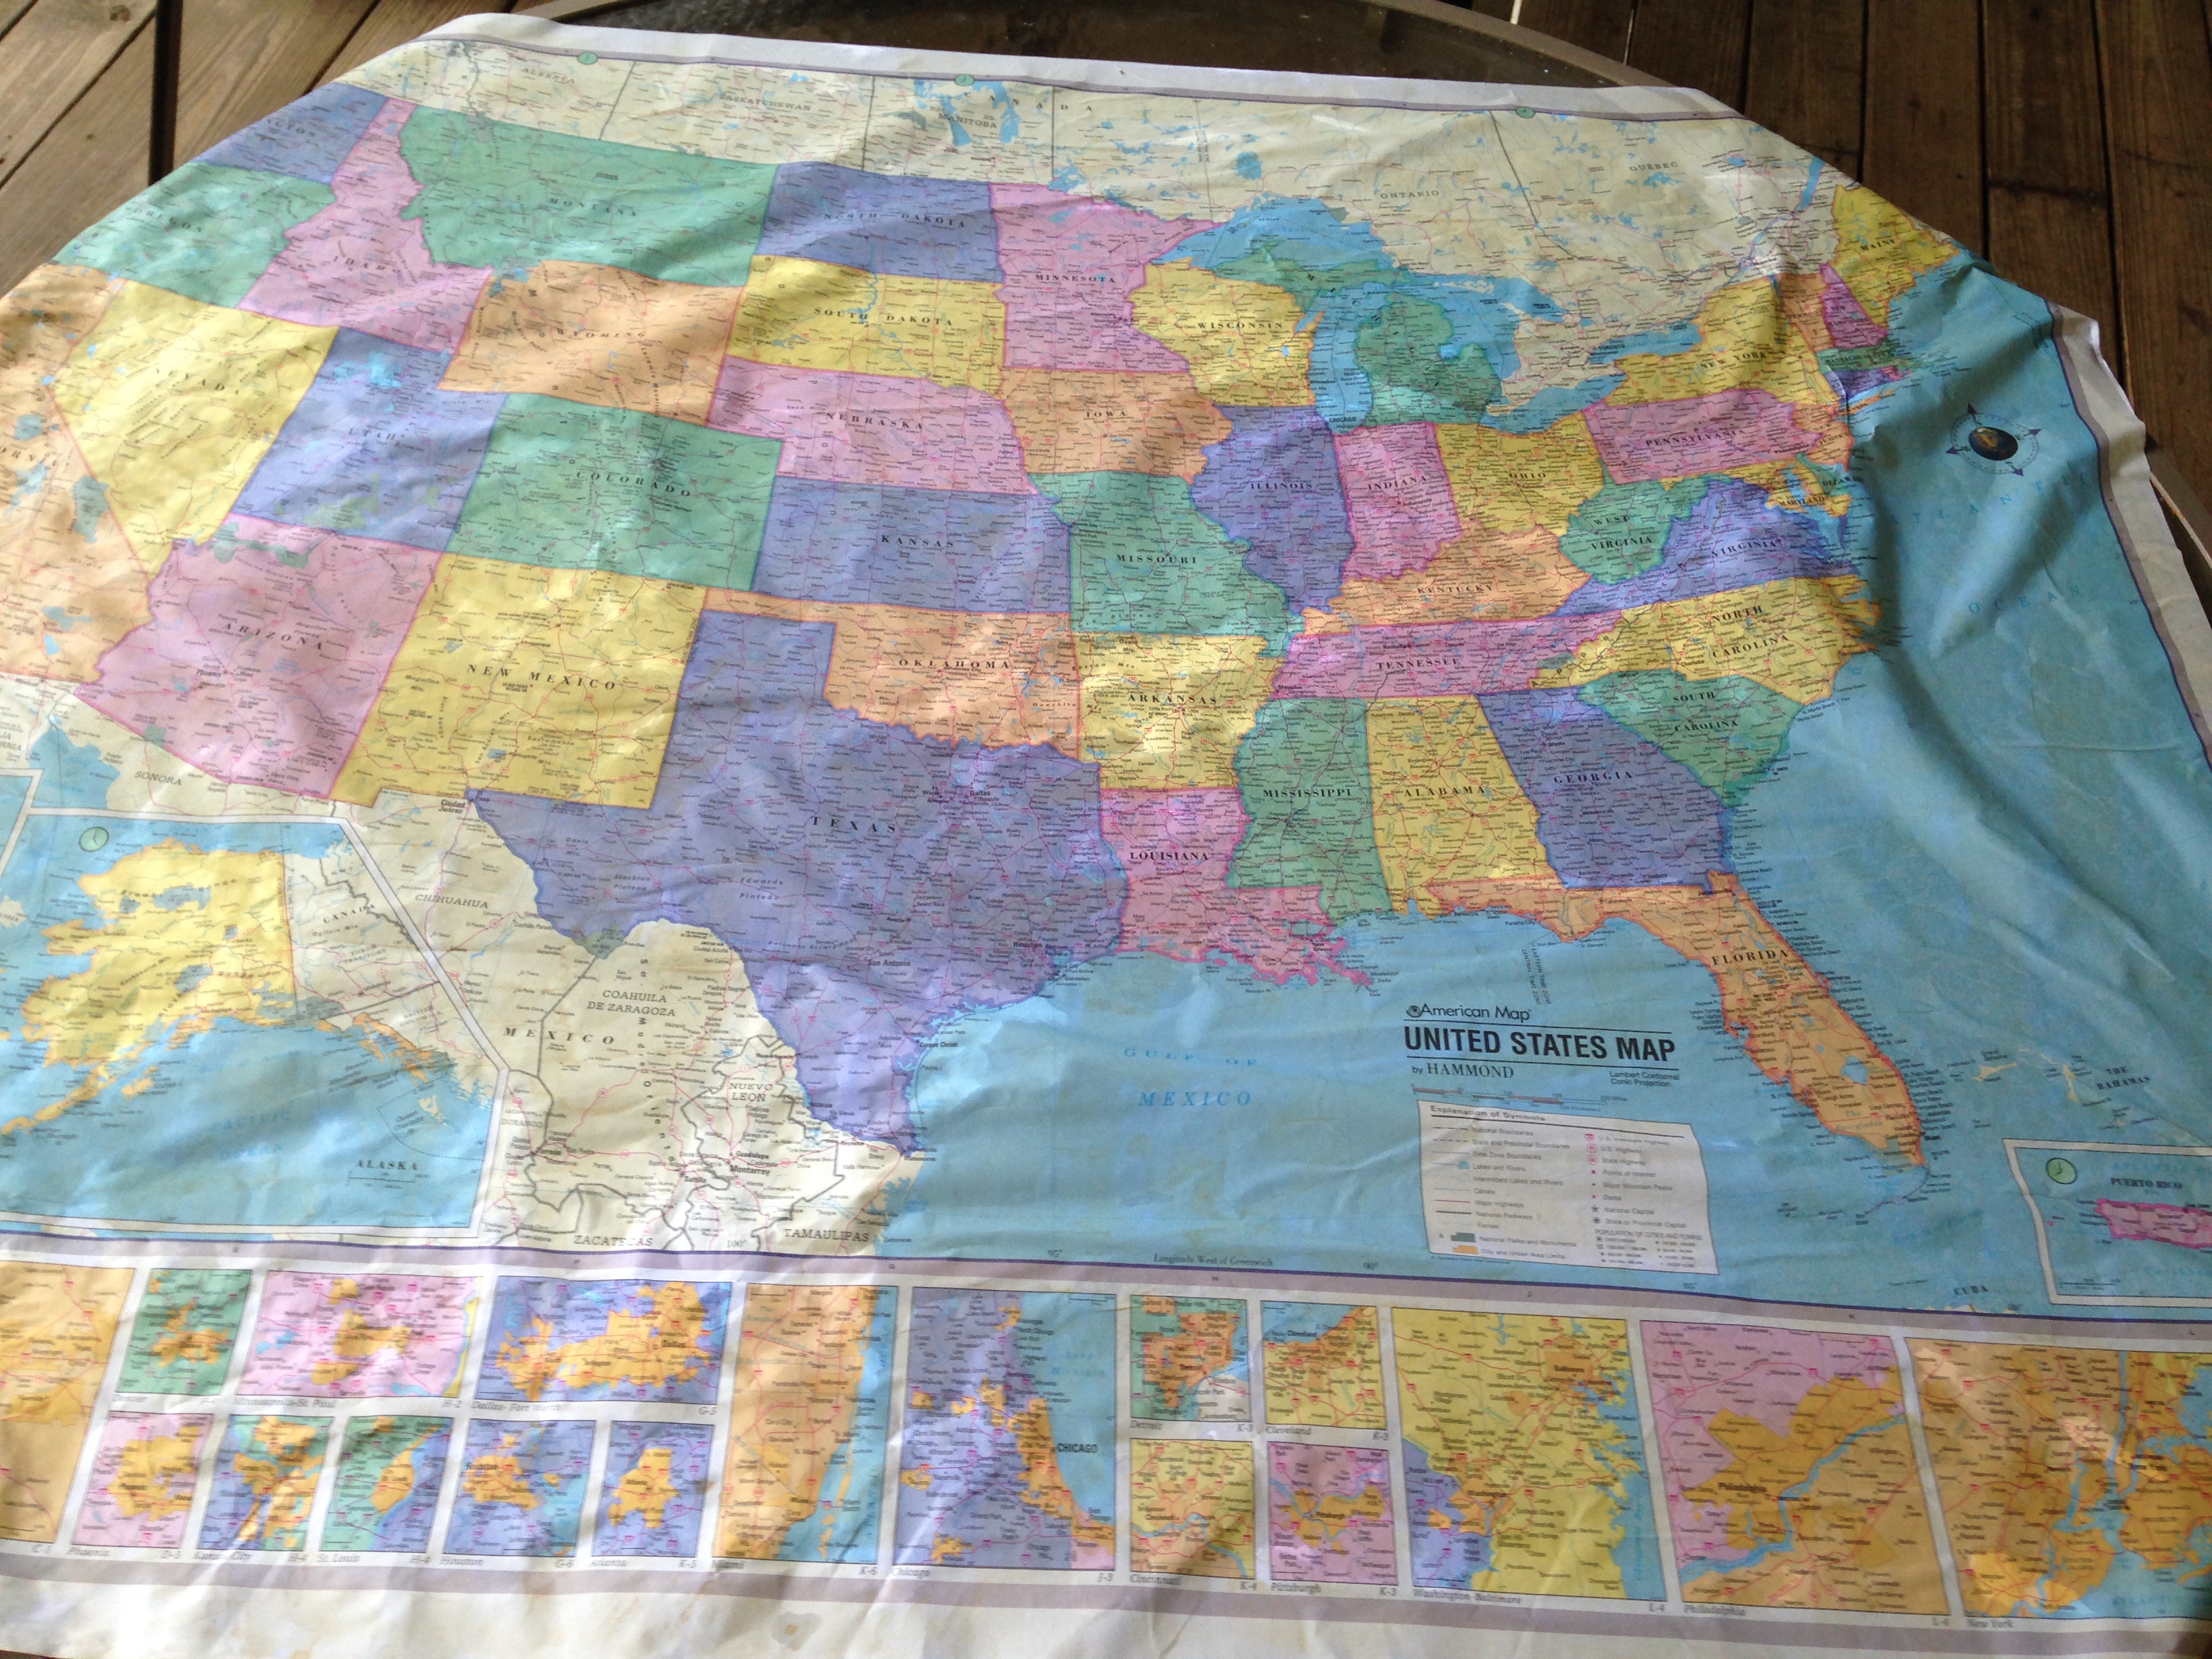
I swapped the tea bag for a cheapo sponge brush and went to town brushing on tea.  There is no real “wrong” way to do this……I don’t think….  It just depends on what look you are going for.  Once the map dried, which is quite a feat in 100 degrees with insane humidity, the brush marks were just too visible for my taste.  It also wasn’t quite as yellowed as I was wanting.  For the second coat, I decided to put the tea in a spray bottle and spritz the map until it was super wet.  Be REALLY careful trying to move a wet map!  Once the map dried the second time, it was pretty much perfect for me.  Yay!  One other note, I wouldn’t do this on a wooden table.  I did it on a glass patio table.  Your workspace WILL get WET.

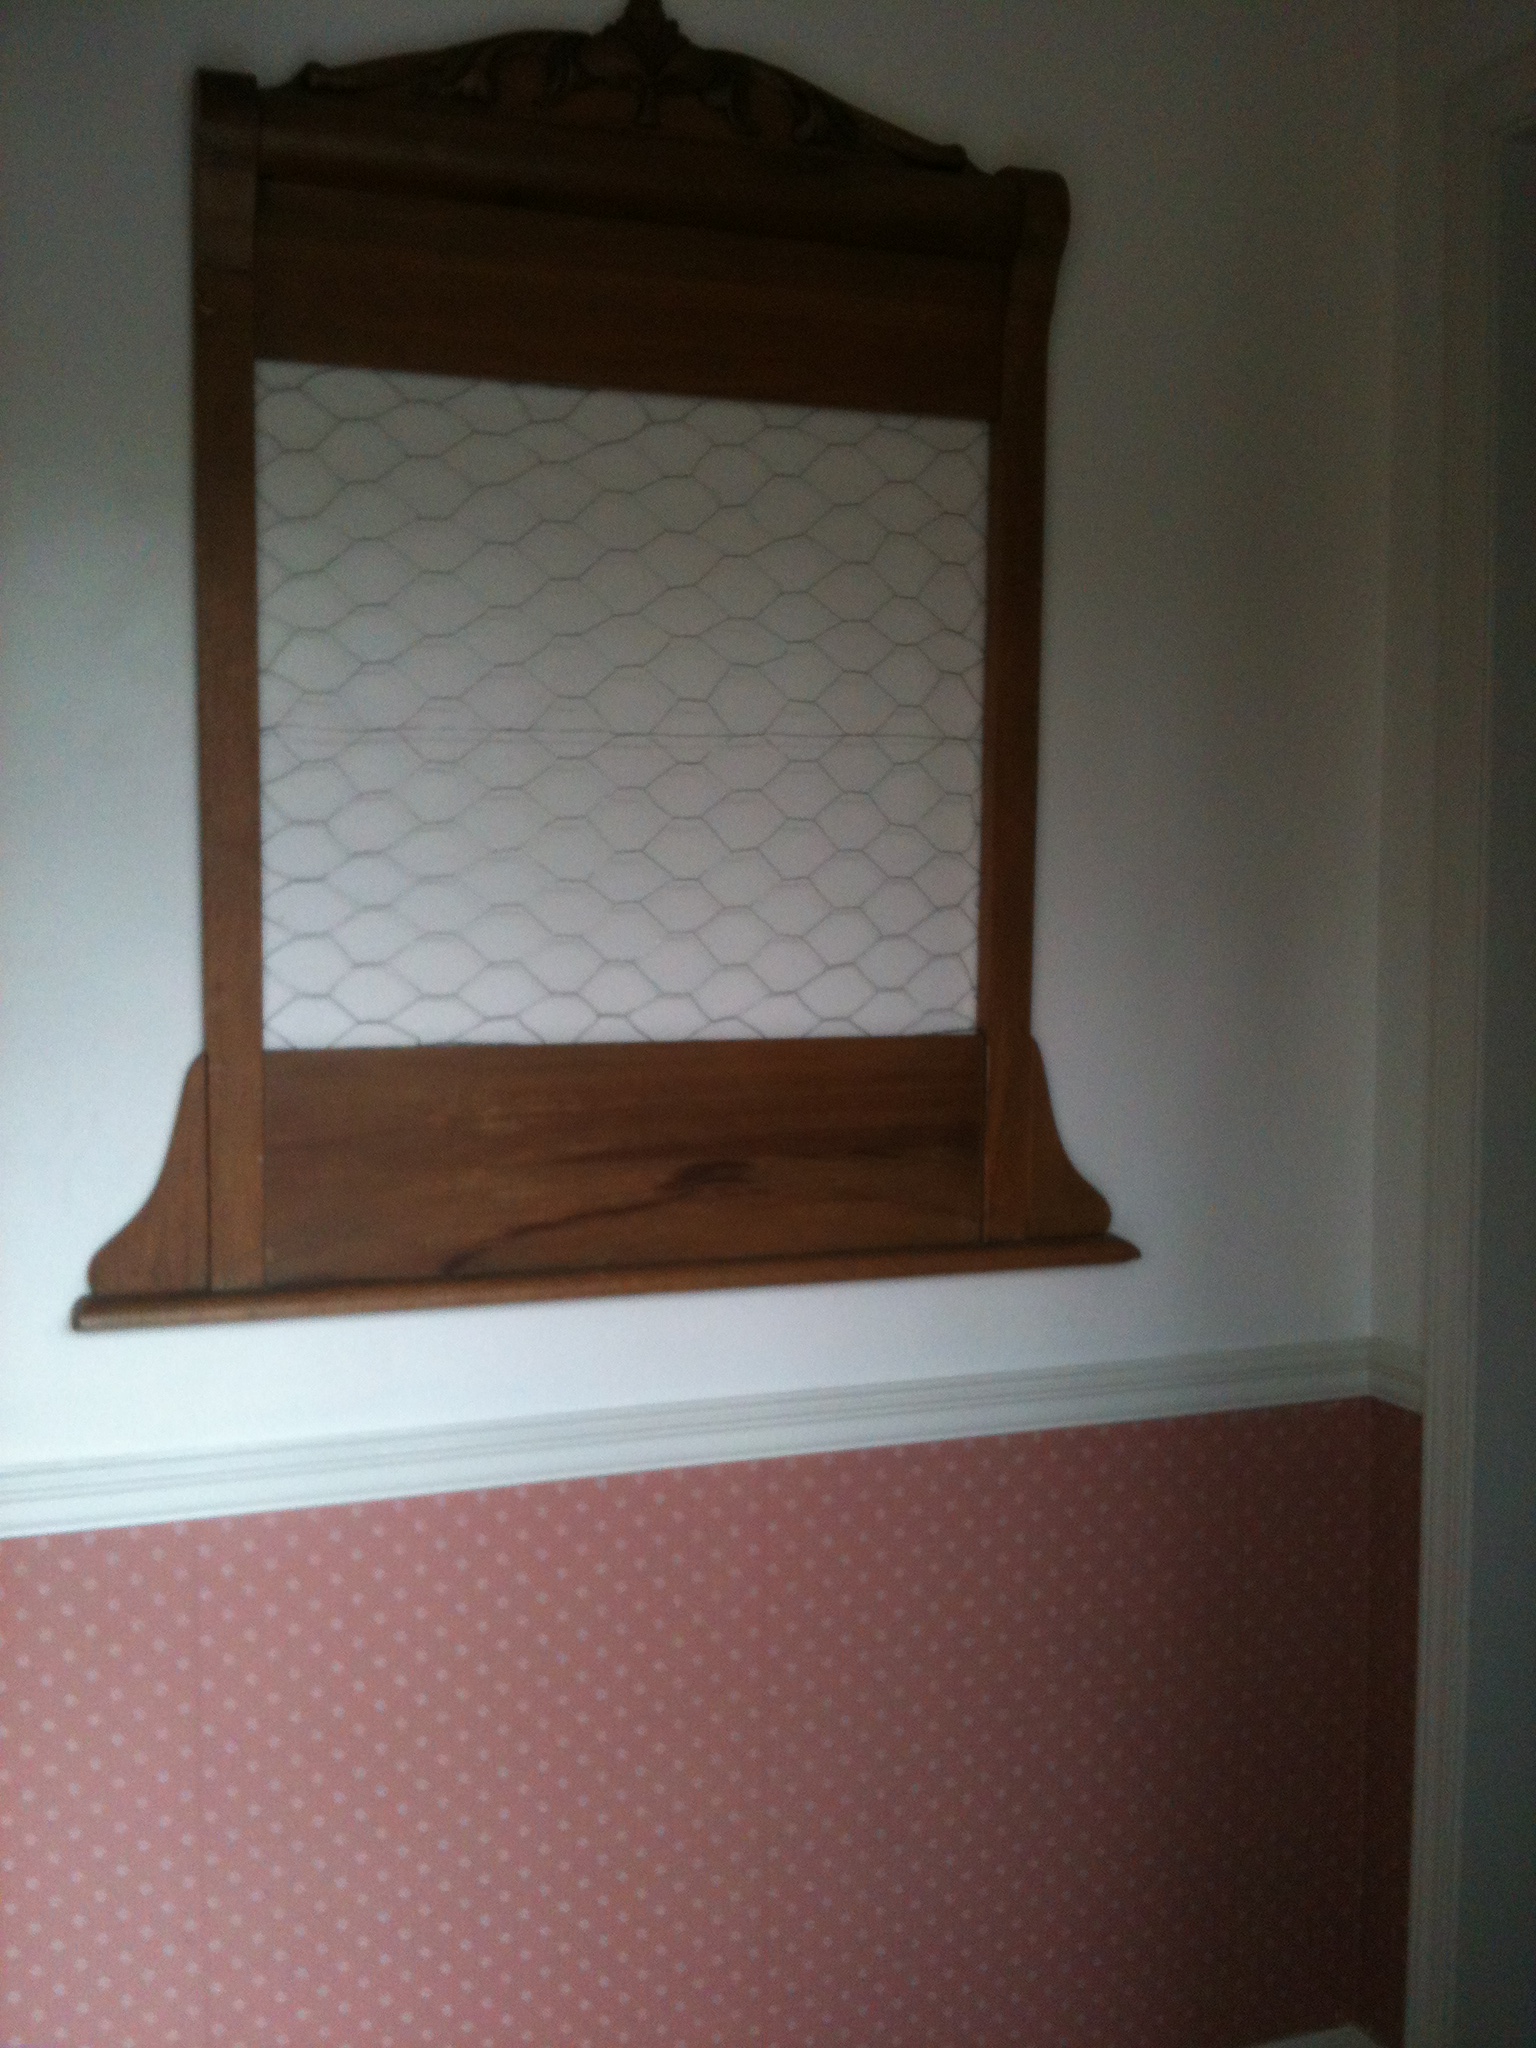
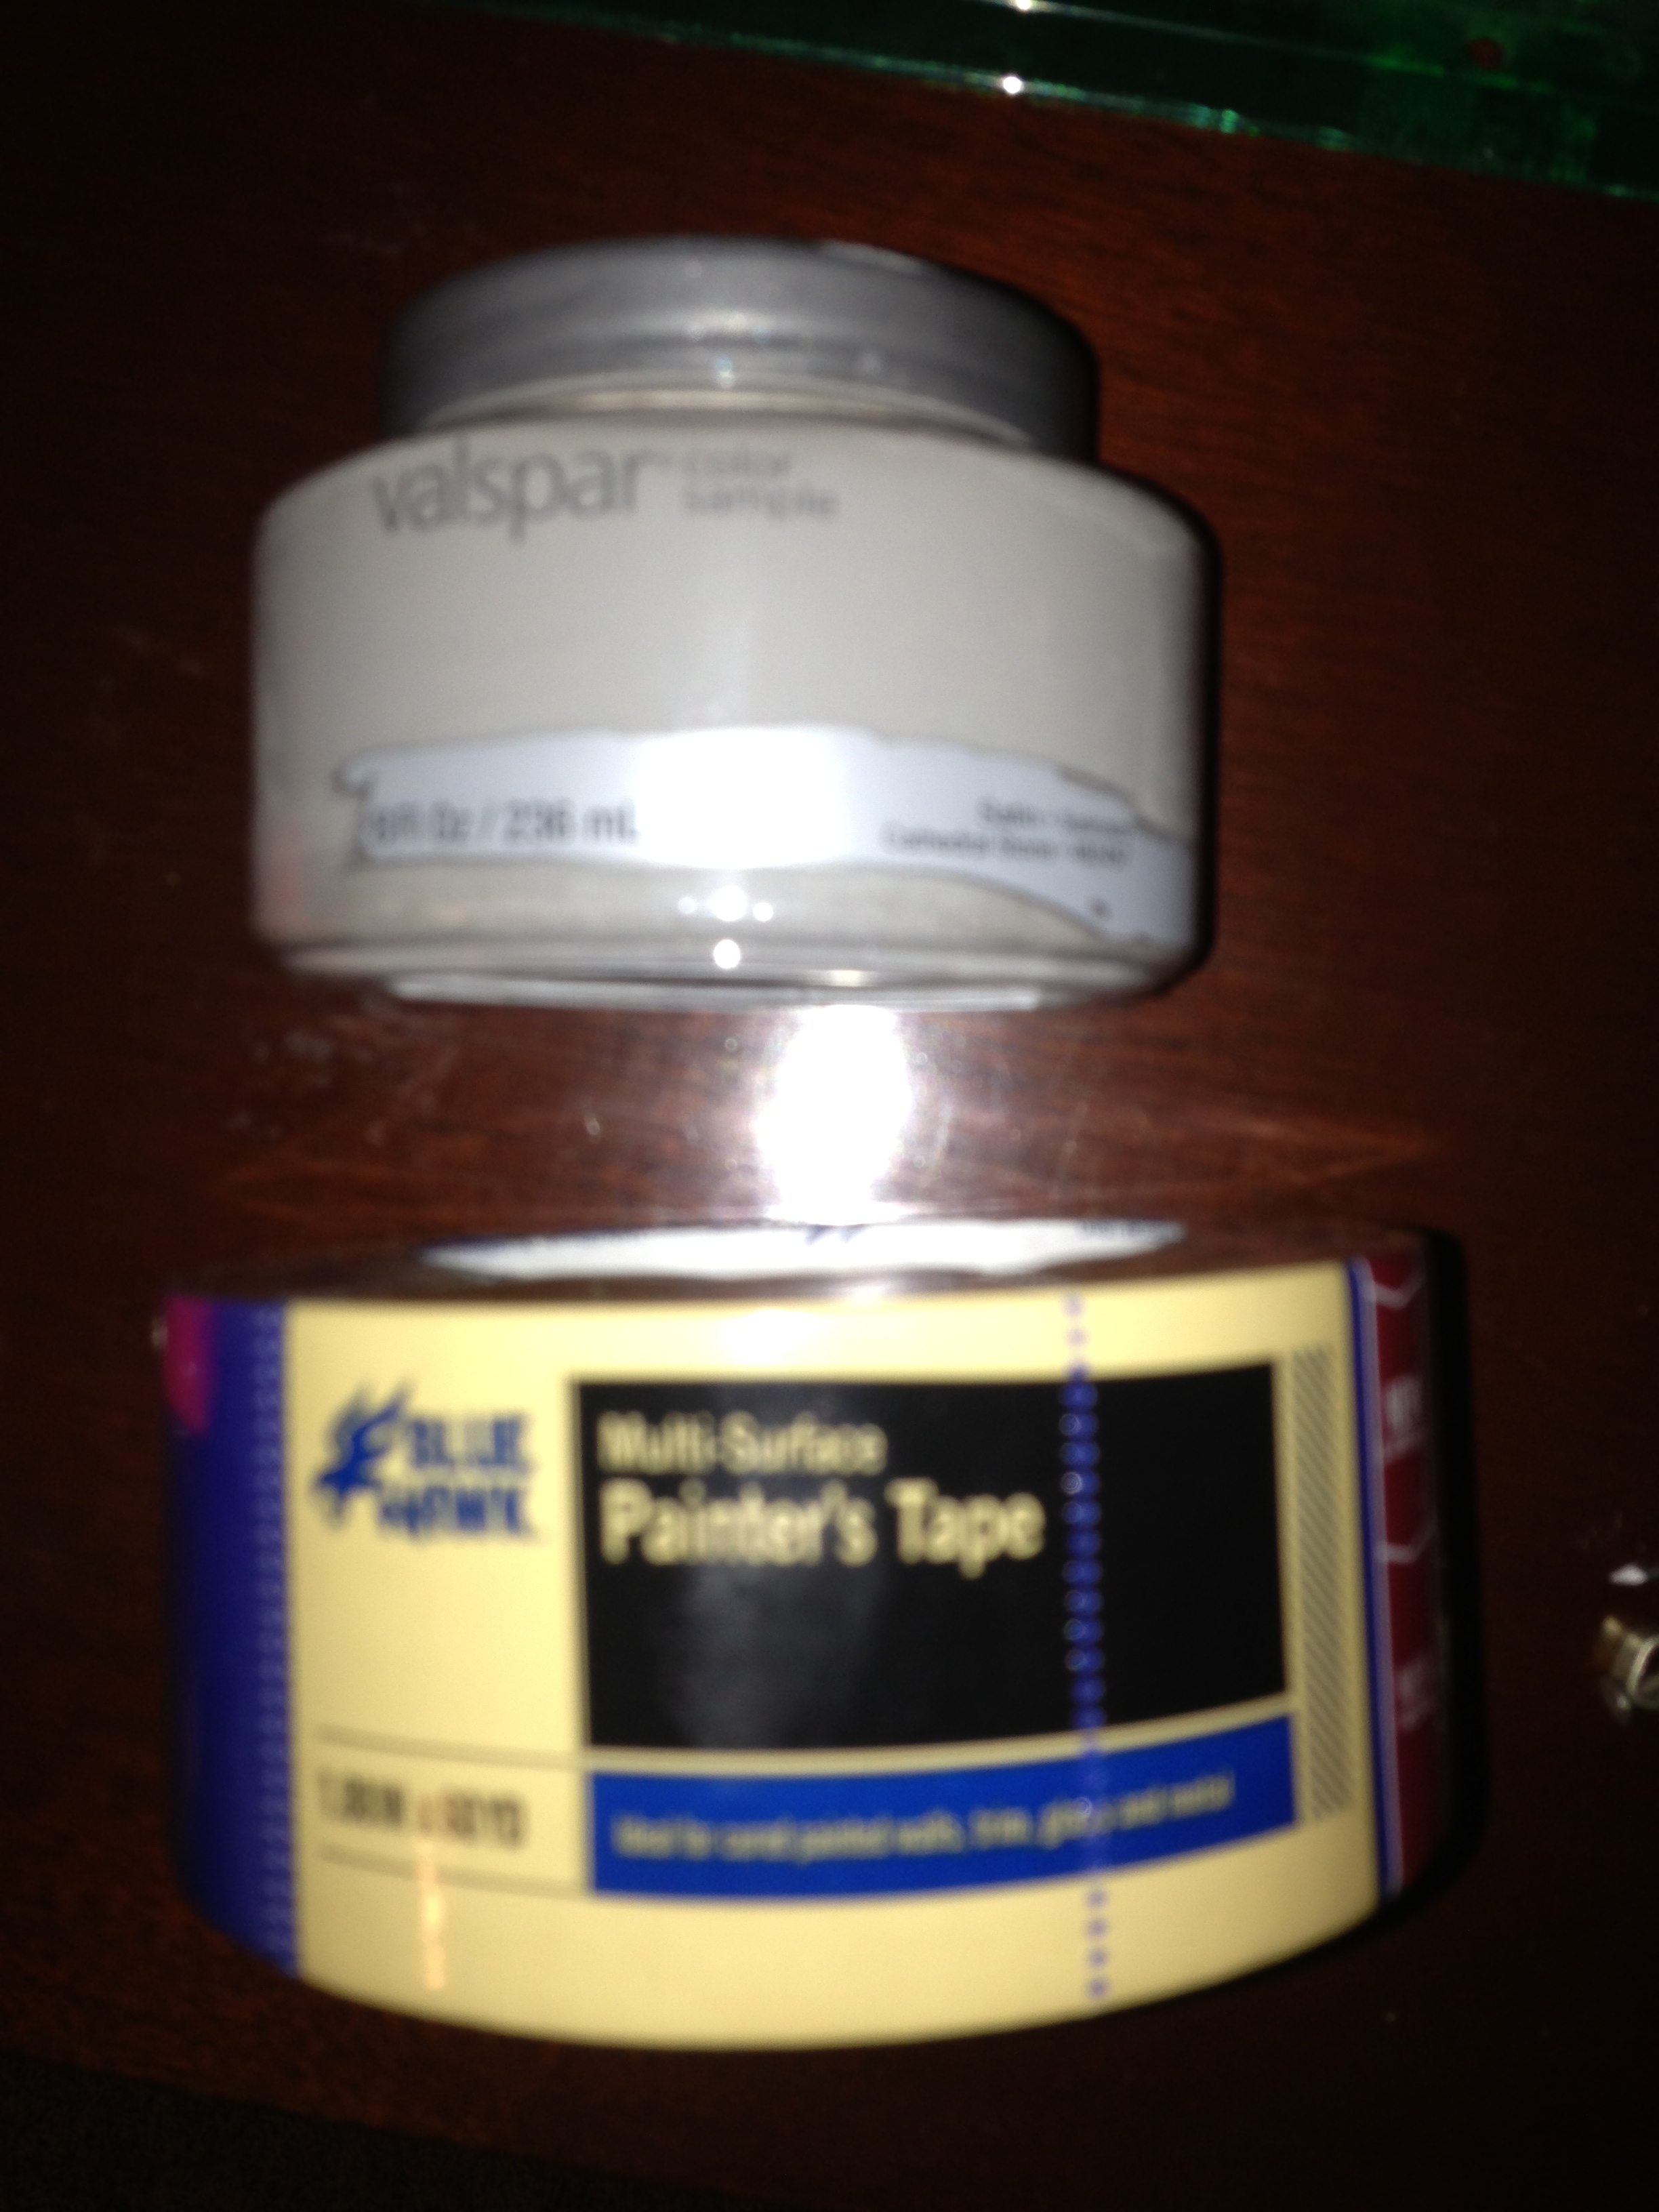
Now, how was I going to hang that sucker?  Frames that large are not cheap.  I loved the old school pull-down map look of the tutorial, so I scoured the hubs’ dowel collection.  Too short.  I priced the ones I would need at Lowe’s.  Too expensive ($13!).  So, I asked the hubs about scrap wood.  He had some, but it was more cube shaped and kind of warped.  I went back to Lowe’s and saw some cute bronze café curtain rods on clearance for about $6.  Perfect!  I zipped home, grabbed my map, some clear packing tape, and scissors.  I pulled off short strips of packing tape and cut them in 1/2 so they wouldn’t show over the edge of the café rod. I seriously just stuck the tape to the back of the map & then to the back of the cafe rod.  (You could just put more of the tape on the map if you didn’t feel like dealing with cutting the tape.) Then I just hung the rod with the hangers included in the package and voila!  I have an “antiqued” map!

IMG_5159IMG_5157

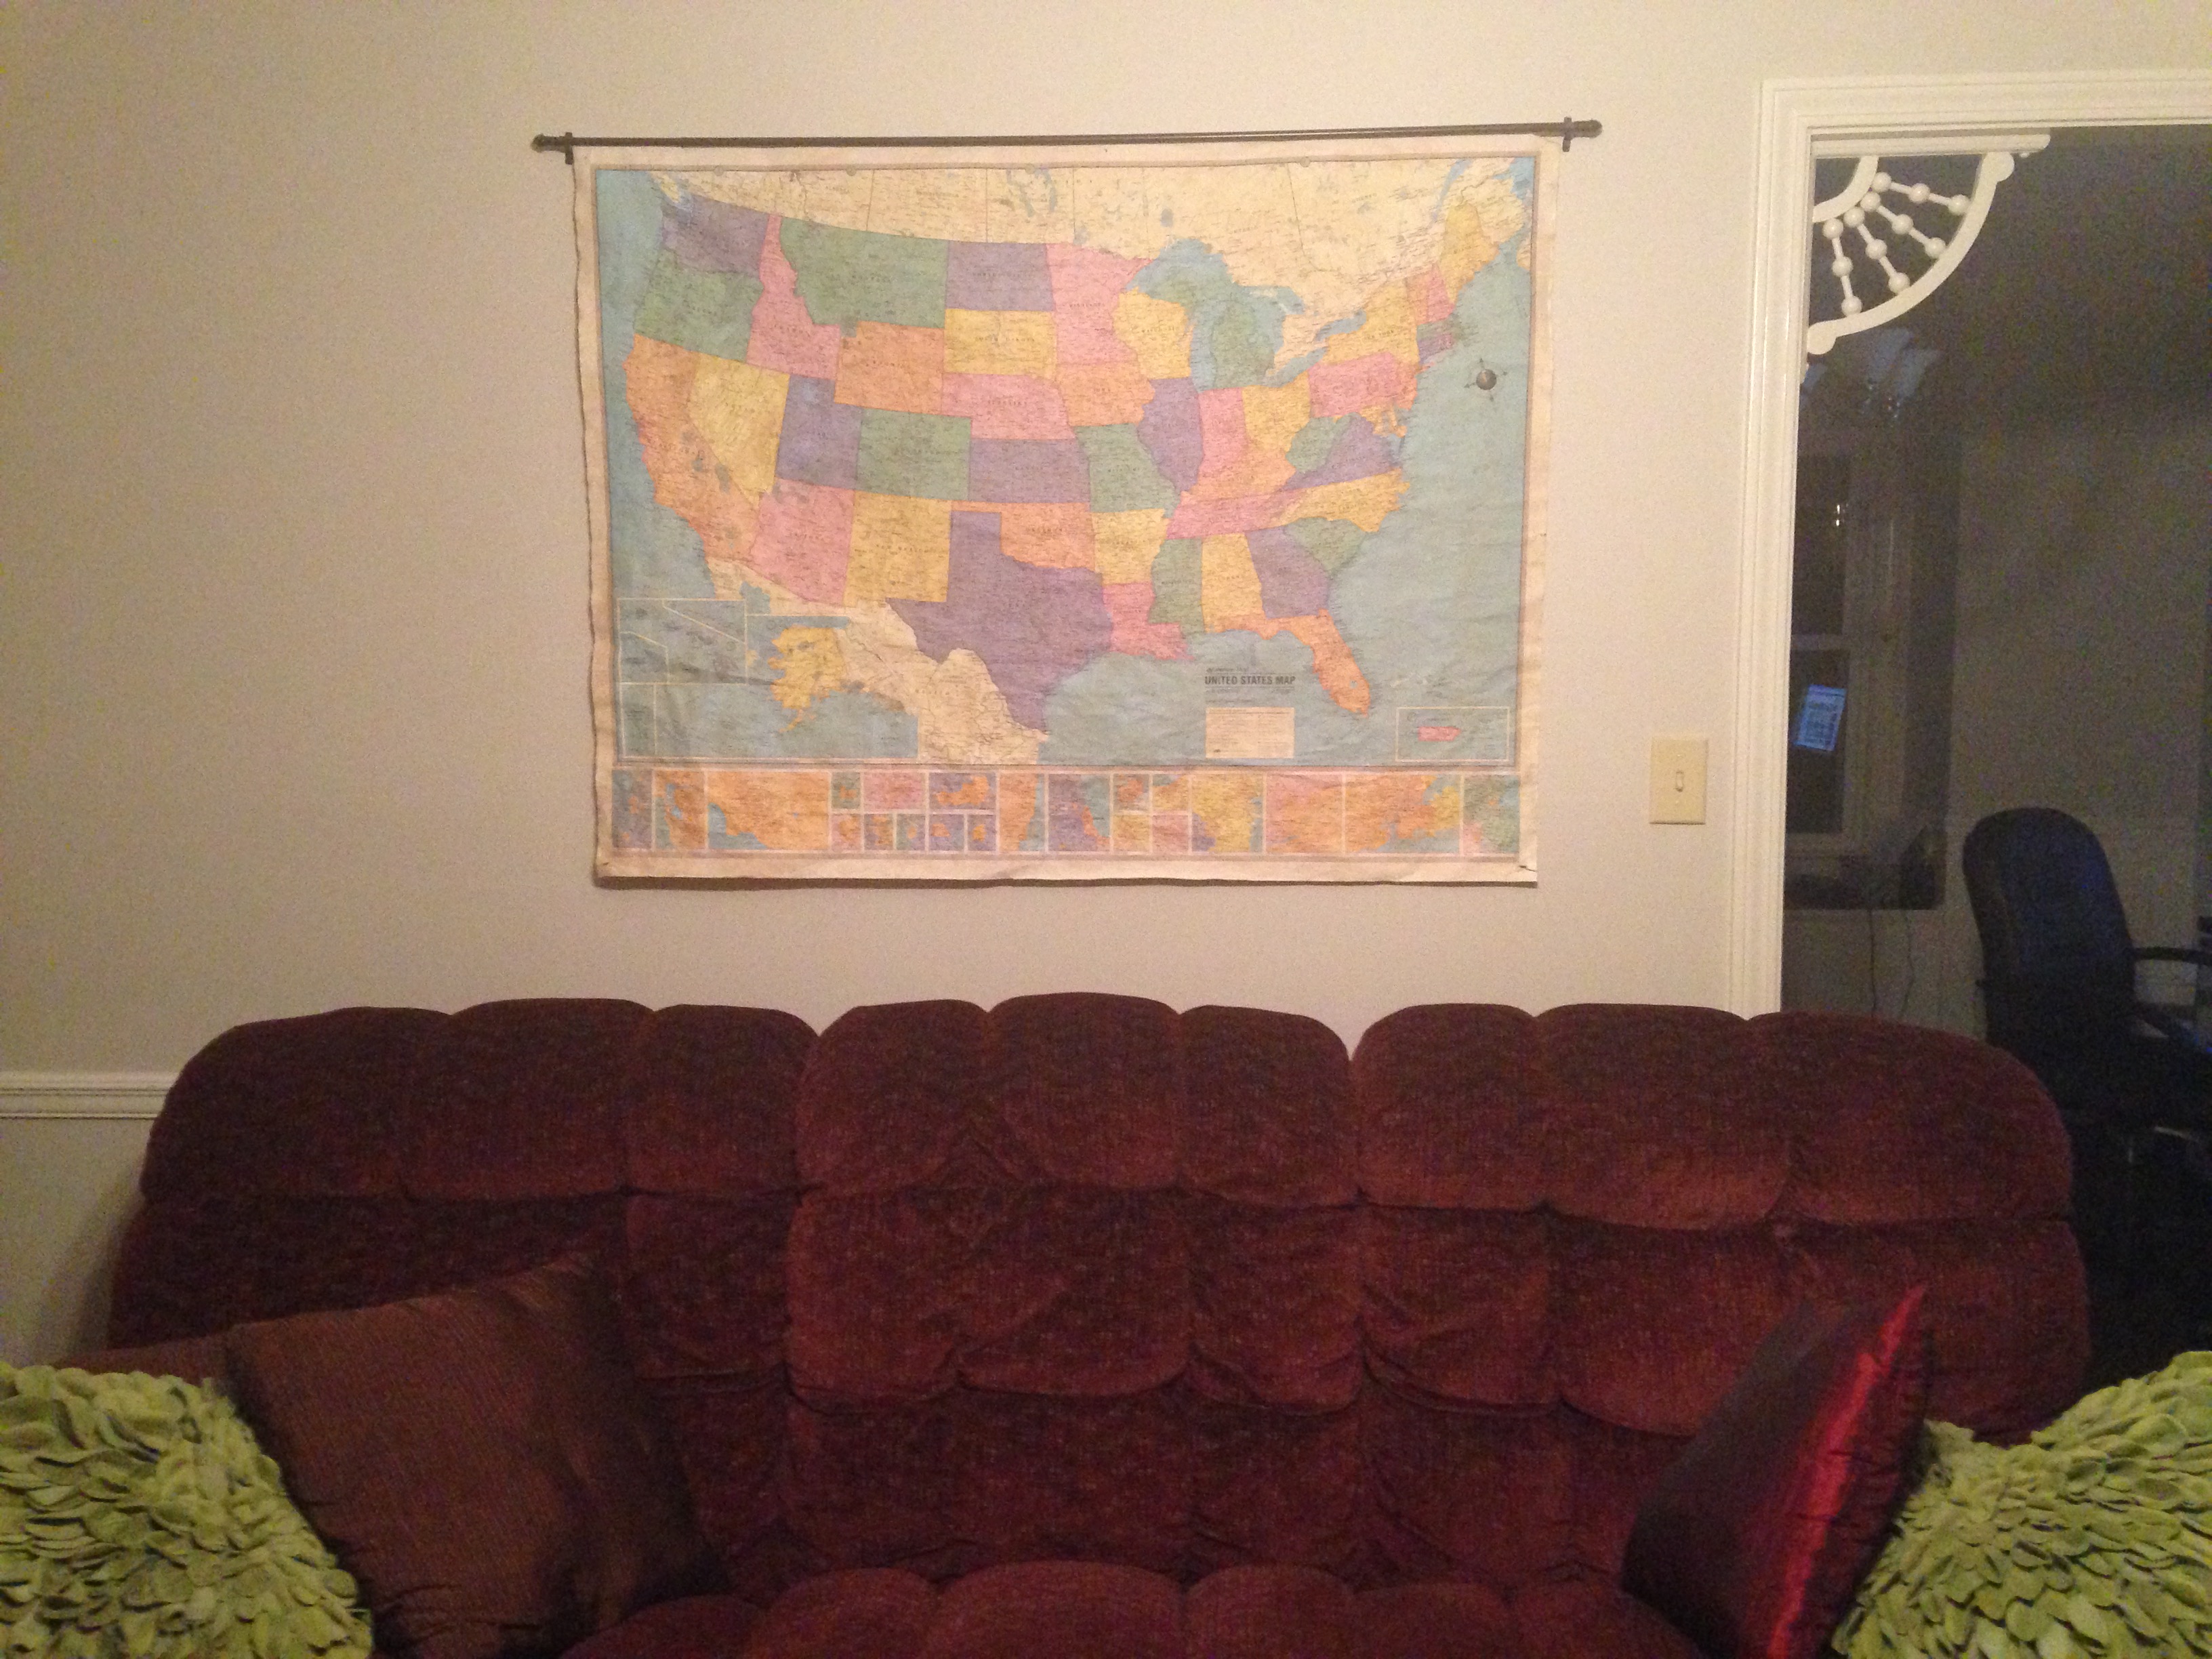
So far, I love it.  Eventually, I’ll do something with the blankness on the wall to the left side of the map.  Eventually.

It’s 9:30 at night and I use an old iPhone for pics.  Sorry for the quality, but you can kind of see the difference the tea made in the color of the map.

IMG_5161

What do you think?  (Other than thinking I need to get a real camera, that is.)

Entry Progress

Standard
Entry Progress

Our entry is definitely a work in progress.  It is SMALL and weird, which makes it interesting to decorate.  Especially since I have no set “style” or “taste” in decorating.  I love pretty much everything & every color.  Ugh!  Guess I’ll just have to change it up often!

The entry is shaped like a “T”.  The front door is at the top of the “T” and off to the right, with stairs to the left and the den to the right when you walk in.  The top of the “T” is 12’3″ long, with the den side being 57″wide and the stair side being 39″ wide.  The leg of the “T” is 15’5″ long and 39.5″ wide.  So, it’s a wonky “T”.  Is “wonky” a word?

Anyway, we started with some fabulous 1986 rose colored wallpaper under the chair rail and parquet flooring.  Need a visual?  Here ya go!

HPIM1331


Lovely, right?  Not so much.  We hopped on the DIY Wainscoting bandwagon and then put down new laminate flooring when we did the kitchen floors.  SOO much better! We’d still love to paint above the wainscoting, but with the 2 story ceiling, we know we’ll probably have to hire that done.  However, the wall facing the front door has a low ceiling, so I got to thinking.  (Which is dangerous, by the way.)  It was looking a little boring……  Oooh!  time for some STRIPES!  Yep, yep, yep!   I headed out to Lowe’s for some painter’s tape and gray paint.  I knew the stripes HAD to be gray.   I love stripes!  The color is Valspar’s Cathedral Stone.

IMG_3355


I had painted some stripes on the wall in our powder room & learned quickly that I did NOT want narrow stripes on this wall.  Waaayyy too much work!  So, I went with 12″ stripes above the chair rail.  That gave me an odd number of stripes, which I just think looks better.  I taped it off & started painting.  Realized I needed more paint.  Ran back to Lowe’s.  Came home and finished the stripes.  I’m just good like that at planning.  🙂

IMG_3356IMG_3358


57″ sounds like a lot of space until you try standing in it to take a picture. So, I had to step out onto the porch for the rest.  I added this little game table, but it was just too small.

IMG_3364


I hit all the thrift stores in our area for a dresser, because Pinterest told me that was the way to go.  No luck.  Yet.  But, I was able to talk one of my girls out of her dresser so it’s in there now.  I changed the hardware and slapped a lamp on top of it.  It isn’t perfect, but it’s getting there.  If I don’t find a dresser/chest by Spring, I’ll just paint this one.  The idea of which is killing my husband.  “You’re going to PAINT the OAK dresser?!”  “Yes.”  He’ll come around.

IMG_3495IMG_3496


The lamp has since been redone (surprise!) with some paint & a slipcover for the lampshade.  I’ll share that another day.  The dresser knobs are now a cool antiquish aqua blue.  The best part (other than the stripes) is how much storage this will give us for lightbulbs, batteries, emergency candles, etc.  (By the way, notice the new laminate floors?  Love!)

Organized Quiet Time

Standard
Organized Quiet Time

This year, our faith family is reading through the Bible together.  Our  sermons will be based on the readings each week and there are also devotionals to go along with each day’s readings.  There are weekly prayer guides as well.  I am SUPER excited about this, but honestly, it adds up to a LOT of paper. Especially since 4 out 5 of us are using these guides for our Quiet Times (personal Bible study time each day).  (One of my daughters is diligent when it comes to studying her Bible and she already had a Bible study plan in place.)

In January, I printed out the 2014 Bible Reading Plan and posted it in our home office.  You can get a copy of the Plan here.  I also printed the daily devotions for one week and the corresponding prayer guides.  I did this for all 4 of us following the Plan.  And there was paper everywhere in our 4 Quiet Time areas.  This paper explosion could not continue if my sanity was to remain.

One day, as I was perusing my Pinterest board on Organization, I came across some ideas and printables I had pinned relating to budget/finance.  (Insert best Gru voice here)  “Light.bulb.”   Why not use these ideas for all the paper generated by our Quiet Times?  So, I did.  It took me a few days to get around to it, but I did do it.

The first step was to gather a lot of stuff we already had on hand.  (So, this was free & I do love things for free!)  Everyone got a white binder and I made cover sheets to slip in front so we could tell them apart.  Here is a picture of mine and my husband’s.  One day I may go back and make mine “cuter”, but that is for another day.

IMG_3451

Then the printing began!  First, I downloaded a copy of the devotional book we are using in conjuction with the reading plan.  It is For the Love of God by D.A. Carson.  You can download your copy of Volume One (FREE!) right here.  Yes, it’s legal.  Also at that same link are links to the Guide to Personal Worship, Guide to Family Worship, and Personal Disciple-making Plan. All are in PDF form for you to download and print.  Next, I went here and printed copies of the weekly Prayer Guide.  (There is an Archives listing if you would like to view/download any prior Prayer Guides.)  The Prayer Guide also lists the Bible Readings for each week.  By now I hope you see what I mean about a LOT of paper!  Here is what the floor of my dining room-now office looked like as I prepped just one week’s worth of Quiet Times for 4 people.  And that’s just the devotional pages.

IMG_3450

In addition to all of the print outs, I inserted a sheet of looseleaf paper after each devotional to use as a journaling page.  I also created a “Planned Prayer” guide for the front pocket of each binder.  This basically lists things that will be prayed for on a particular day.  For example, every Monday we pray the strengthening of each family member’s faith.  There are 3 items for each day of the week.  There is also a space for “spontaneous prayer”.  Things that the Holy Spirit brings to mind.  The sermon regarding prayer is here, as well as the others that go along with our teachings thus far.

I put each binder together in the following order:  Planned Prayer list (front interior pocket), Guide to Personal Worship, Guide to Family Worship (Mom & Dad’s binders), Weekly Reading & Prayer Guide for first week, Devotional for Day 1, blank piece of looseleaf paper, Devotional for Day 2, blank piece of looseleaf paper, etc.  Hopefully, that makes sense!  For my personal binder, I inserted tabbed page dividers to separate each month of devotions.  I used some Washi tape to “cutify” each tab and then used my label maker to print the name of each month for the tabs.

IMG_3472IMG_3473


Now, we can all have our Quiet Times AND I can have my sanity!  Well, what’s left of it.  :-0

If you didn’t have a plan for your personal Bible study time, now you do!  If you have any questions, I would love to hear from you.

Winter Storm 2014 – Our Story

Standard
Winter Storm 2014 – Our Story

Most of you know that the South was slapped with some crazy snow & ice on Tuesday.  You’ve probably seen the news coverage and heard the stories, but I thought I would share our story.  It will be disjointed & probably use poor grammar, but here it is.  It’s not nearly as dramatic, or sad, as some.  For that I am forever thankful and feeling very blessed.

We were blessed in that none of us had to spend the night in our car, freezing.  Why did that happen to so many, you ask?  Because, around here, when snow is forecast, we mostly laugh.  We may see a few flakes, but the ground is rarely cold enough for it to stick.  Also, they had forecast the snow to be mostly south of us, with very little hitting our area.  So we went about our day thinking schools would probably let out around 1:00pm and everyone would go home then.  We were so wrong.  Within 30 minutes of seeing the first flake, bridges and hilly roads were freezing.  When I say “hilly roads”, you need to understand that we live in eyesight of a world class mountain biking park.

Here is how my day went:  I got the hubs off to work, kids to school & went to the mall for my usual 3 mile walk.  Came home and grabbed my coupons.  My plan was to get to Old Navy to swap out a sweatshirt for my daughter and then hit the grocery store on the way home to meet the bus when school let out.  I was thinking school would let out at 1:00 at that time.  The first flakes hit as I was on the way to our Old Navy.  It’s not far.  Within 20 minutes I had driven clear roads, swapped out the shirt, and was met with a FROZEN piece of ICE on my windshield.  WHAAT??  I started towards home on now snow covered roads.  Dummy (me) stopped at the grocery store for a few things to make soup.  Mistake.  There is a mountain between the grocery store & my house.  Within 10 minutes of being in the store, cars were literally sliding down the mountain.  It was ugly.  I panicked and called my husband.  I couldn’t get to my girls.  Then the phone lines were jammed with so many people stuck in similar, or worse, predicaments. One of whom was a friend who was north of the city and asked me to get her girls.  Once the phone lines became jammed with callers, we couldn’t get through, but we could text & text we did!  My husband tried several routes for a couple of hours to reach me in his 4WD truck.  Too many wrecks.  He had to turn around and eventually abandon his truck about a mile from his office and walk to his office.  (Yes, his truck was off the road so it wasn’t blocking traffic.)  While he was trying to get to me, I was in a text-a-thon with friends.  We all were wanting to get to our kids, because the school busses were grounded.  This is where I must say that I am SO grateful that I live close to everything!  We are within 3 miles of schools and grocery stores.  One neighbor was able to get her kids, my kids, and 2 friends to her house.  My kids + 1 friend walked from her house to our house (next door).  They were home.  But I didn’t know because my phone had died.  I just knew she had them, so I trusted her to get them home.  Bless her!!

I had gone into a hair salon to wait.  Then I decided to walk.  One of the ladies in the hair salon gave me her gloves because mine were at home.  Another lady said she would walk with me.  I grabbed several bags of groceries and the bag of sweatshirts.  Thankfully, I had bought a couple more while at the store.  The lady & I each used one as a scarf and off we went.  Soooo many people were walking.  Some crazy people were still trying to get up the mountain in a car, and sliding back down.  Walking got to be dangerous due to the cars sliding down, but we made it.  We picked up some others as we went.  All walking to get kids from school or just trying to get home.  A lot of high school kids were walking from the other side to meet parents in the parking lot who couldn’t get over the mountain.  About 1/2 mile from the high school, a couple stopped and offered us a ride.  They dropped me at the high school, where I went in to get a friend’s older daughter.  When I got out of their vehicle, I managed to leave one bag of groceries.  Oh, well.  They certainly deserved it for driving around to help people get where they needed to go.  I forgot to even try to offer them gas money.  I have no idea who they were.

When I got my friend’s daughter at the high school, I explained that she could stay at my house with her sister and my girls, but she would have to walk a little over 2 miles to get there.  Bless her heart!  She looked a little startled, but took it good naturedly.  We made it to within 1/2 mile of my house & one of my other neighbors took us home in his truck.  He was out in his truck helping get kids home on our side of the mountain.  We were SO glad to see him, especially since we still had another hill in the neighborhood to get over and my arms were going numb from carrying groceries.  Once home, I found my girls and friends having snowball fights in the yard.  Hallelujah!!  I went in to plug in my phone and let my friend know I had her girls and let hubs know I made it home.

We never lost power.  We didn’t lose phone service – other than lines being tied up with so many stranded people.  We were blessed!  My husband was stuck at work, but he was safe.  He and some co-workers walked up to the mall to get food.  Like so many other places, the Panera Bread was giving free food to anyone who could get to them.  Thank you, Panera!!  Around 1:00AM, hubs thought he could get home.  One of his co-workers has a 4WD Mercedes car.  He took hubs to his truck.  From there, my determined husband drove home over the icy roads.  Most cars were pulled over and abandoned by then.  He did not, however, let me know he was coming home.  I was obviously SOUND asleep.  So sound asleep that I did not hear the garage door go up.  Or down.  But, buddy, I heard the alarm system say “Fault Den Garage Door!”  The dog came straight up to all 4’s from his bed and I came straight up and over to the gun from my bed.  As I was reaching in for the gun, I heard a quiet, “Honey?”.  Glory!  Needless to say I didn’t shoot him……but I took it into consideration for the scare he gave me!

My friend (whose daughters were at my home) made it to a shelter for the night and then home the next morning.  Once the hubs finished some conference calls (he works for a utility company), we loaded her girls in the truck and found a route to their house on the other side of the mountain.  Once they were dropped off, we were able to pick up a friend that had spent the night on that side with a kind family who were strangers.  Sooo many people opened their homes & pantries to stranded people!  We loaded up my friend and stopped by her car and mine to get all the groceries.  (She had been in the grocery store the same time as me.)  Our car is still on the other side of the mountain, but we are all home and safe.  Hopefully, the car will make it home today.  I’ll leave you with some pictures:

20 minutes after first flake

20 minutes after first flake.  The windshield wipers were having no effect.

IMG_3434

The next afternoon. The majority of these cars are abandoned. One lane of moving traffic.

IMG_3420

The view from my window the next morning.

IMG_3424

Our deck the next morning.

IMG_3425

View from our front porch the next moring.

IMG_3442

One of so many wrecked cars that had to be abandoned the previous day.

IMG_3441

The road to our neighborhood the next afternoon.


My Weight Loss Journey

Standard

On January 15, 2013, I wrote a post titled 100 Day Challenge.  That lasted less than a week.  I had completely forgotten that I even wrote it.  On January 13, 2014, I posted New Year, New You.  I referenced my weight loss & promised to share more info.  Since April of 2013, I have lost 35 pounds.  Thirty of those have stayed gone.  Five of those I am just playing with apparently, because they keep popping back on the scale.  But, honestly, it’s OKAY.  This is not a diet, this is a journey.  This is my life.  This is God helping me conquer a food addiction.  If you are Googling “weight loss” or “how to lose weight”, then you are familiar with this addiction.  If you have a Pinterest board dedicated to “Fitness” or “Weight Loss” with scantily clad chicks showing off their abs & butts, and lists of work outs you have never attempted, then you are familiar with this addiction.  Every story is different.  Yet, every story is the same.  Since you are here, I’ll share my story.  What inspired me?  What did I do?  What did I NOT do?

Let’s go back about 10 years.  I had 3 children under the age of 3.  Due to some life circumstances, I decided to return to work.  Shortly after hiring on at a small law firm, another girl was hired.  Instant friends.  Love her still!  We talked a lot about faith, family, our boss, and weight.  I recall telling her that skinny people were truly lazy people (in terms of food).  Seriously, if there was nothing laying around that they wanted, they just wouldn’t eat.  But me?  Well, honey, I would HURT myself and risk my job to sneak out to Dairy Queen for a Blizzard.  Oh, yeah!

Years have passed and life has changed in so many ways.  My friend & I left that firm and went in different directions.  Facebook keeps us in contact.  One day last year, my sweet friend posted on FB that she had lost a significant amount of weight.  I was so excited for her!  But I was still Googling “weight loss” and “how to lose weight” and Pinning exercises I would never do & pictures of airbrushed workout chicks I would never look like.  She posted again.  Still losing.  Thank you for those posts, my friend.  You were my inspiration.

So, what did I DO?

1.  I stopped talking about it.  I quit asking people how they lost weight.  I quit voicing excuses.  I KNEW what to do to lose weight.  You know, too.  So quit asking people.  Quit checking out Google and Pinterest.  Just. Stop.  Don’t post on FB that you are planning to lose weight, or started running, or joined Weight Watchers.  Not yet.  Quit talking and just realize this is your LIFE.  This is NOT a diet you are starting or an exercise regimen.  This is LIFE.   Take it one day at a time.

2.  I stopped procrastinating.  There was no, “I’ll start tomorrow.” There was no menu planning for “tomorrow”.  I started right then by NOT eating a snack.  I wasn’t hungry, but I am a snacker and love to snack.  I stopped.  Right then.  Didn’t even say anything to my husband.  In the words of Nike, “Just do it.”  Just shut up & DO it.

3.  I did NOT join a gym.  Or cross-fit, or a running club.  I did not break out all the weights, yoga mats and exercise balls gathering dust in a closet.  I have done all that in the past & it NEVER worked.  Plus, I see a LOT of people my age in walking boots, casts, having surgery,etc. as a result of those.  So, if you think you can’t lose weight if you can’t work out, you are full of bull.  I have Plantar Fasciitis in both heels.  Have for years.  It HURTS.  Go to the doctor and do what he says to ease the pain.  (That includes losing weight, by the way.)

4.  I DID join Weight Watchers.  No, they aren’t paying me for this.  They don’t even know me.  Heck, I’m still paying THEM until this last 5 pounds stays gone.  Then I become a lifetime member & no longer have to pay!  I joined WW because it is NOT a diet.  It is LIFE.  It showed me clearly that walking 3 miles & eating a Chick Fil A chicken biscuit did NOT balance out.  Not at all!  I don’t necessarily recommend that you join WW or anything else.  Not until you are ready.  Not until you can do Step 1 up there.  If/when you do join, DON’T use the activity points  you earn.  Don’t do it.

5.  I stopped avoiding my “to do” lists.  In the past, I would get stressed over all the stuff that needed to be done (and I didn’t want to do) and I would just go eat to avoid it.  I would leave the house that had a full pantry/fridge/freezer to go out to eat.   I would even haul our 3 toddlers with me.  By the way, one of the things on that list was “Quiet Time”.  Why did I avoid reading my Bible and praying?  Because my Bible said gluttony is a sin.  So, I said I didn’t have time to read my Bible.  But, I had time to go out to eat.  My stomach was not allowed to growl.  My stomach had become my god & I was FAR better at worshiping and serving it than I was the God who loved and created me.

There are SO many benefits to dropping the weight!  My husband calls me “skinny girl”.  People stop me almost every day and comment on how good I look and how much weight I have lost.  I have more energy to do things around the house & with the kids.   All that is GREAT, but the most awesome thing was when one of my daughters told me, “Mom, I have really seen a lot of spiritual growth in you since you started Weight Watchers.”  Wow.  I had no idea just what kind of example I had been setting for them.  Weight Watchers is not a religious organization.  However, it was the tool God used to teach me restraint and diligence.  Do I fail?  Yep.  Does He forgive?  Every time.  Do people notice my new diligence?  My girls do.  My husband does.

So many things are unsaid in this post.  So many things don’t really need to be said.  You know what to do to be healthier.  No one can do it for you.  No one but you can change the example you are setting for your family and friends.  Oh, the pictures?  Not posting them.  Don’t compare yourself to me or anyone else.  YOU are YOU.  Be the YOU that God wants you to be.  Your diligence in (not) eating will bleed over into every area of your life.  It’s slow, frustrating, amazing, and thrilling. “Just do it.”

Budget Kitchen Before & After (Finally!)

Standard
Budget Kitchen Before & After (Finally!)

Oh.My.Word.  I seriously thought this kitchen redo would NEVER end.  Never.  But (for the most part) it has!  Hip, hip, hooray!!  This will be pretty much a picture post.  If you’ve been here before, you know I am NOT a photographer.  If you haven’t been here before……..um, prepare yourself.

The photos may not be much, but the results are amazing.  We did everything ourselves (except put in the gas line for the gas cooktop).  You can read more in-depth posts on the project here.  If you have any questions, please post in comments & I’ll get back to you ASAP.

Here is some lovely “Before” to get you warmed up!

kitchen before 1

Kitchen before 2

Yeah.  That’s probably enough of that.

Now, for some “Afters”!

IMG_3340IMG_3342

You can see how much more room we have now!  The actual dimensions of the kitchen are 19′ 1″ x 11′ 4″. The peninsula that once held the dishwasher is gone.  We simply turned the dishwasher sideways and it is SO much better!  The ceiling fan is gone.  WHY would anyone want a CEILING FAN in a kitchen?  Over the stove?!?  I know pendant lighting & chandeliers are all the rage, but I am loving the new flourescent light.  The covered deck is off the kitchen & effectively blocks about 90% of the light that could come in the kitchen windows.  It gets DARK in here, friends.  My cute light over the sink is actually an outdoor light.  We took the cabinets to the ceiling.  SOOO much more storage!  The country blue countertops are now Uba Tuba granite & the backsplash is off-white subway tile.  Love!  The new microwave is a convection.  We swapped the drop in oven unit for a gas cooktop & separate electric convection oven.  Both from Craigslist, as was the microwave.  The flooring was worth the wait!  We searched & searched, talked & talked, and thought & thought about flooring.  One night we were out & dropped in a Home Depot we don’t normally visit.  The guy there was FABULOUS!  We talked with him for about 2 minutes & he walked us over to a pile of flooring boxes.  It was PERFECT!  And it was CHEAP!  Laminate flooring for .99/ft.  You can get it here.  You’re welcome.  At that price, we decided that if anything happened to it, we wouldn’t even cry because we could afford to replace it.

IMG_3339IMG_3337

The other side.  Photo-bombed by my adorable assistant.  🙂  You can see the cabinets are to the ceiling here as well.  My fabulous husband built a deeper cabinet over the ugly-but-staying-forever fridge.  It holds my baking stones, cookie sheets, cooling racks, etc.  He also built new drawers in the lower cabinet for plastic containers and pots/pans.  It’s so much easier to reach that stuff now!

IMG_3338

Mr. Cuteness is a little bit of an attention hog.  You’ll notice that the shelf that once circled the dining section is gone.  So are those brackets sporting heart-shaped cut-outs.  Yes, I know a lot of people like that style.  I do not.  Nor do I like country blue wallpaper with flowers.  You probably noticed the mismatched chair cushions.  We got rid of the old chairs and brought in the dining room chairs that belonged to my grandmother.  A couple of them had been in use in other rooms & I just haven’t recovered all the seats to match now that they are in the same room.  It’s coming.  As soon as I figure out what fabric I want.

So, that’s our (finally) final before & after on our budget kitchen remodel!  I have some organization and clean out to do.  Once that’s done, I’ll share pics of the inside of our cabinets, pantry, drawers & pull-out by the dishwasher.

Thanks for hanging out with us through the looonnnggg process.

52 Mantels

New year, new you!

Standard

That’s the promise, right??  The promise shouted from magazines in the checkout line.  The promise we make ourselves every year.  The promise we break within about a month week.  Do me a favor, will you?  Know that you are already fabulous & just go from there.  Take it a day (or hour) at a time.

For the two of you who still check in from time to time……I love you.  🙂  We have been working on several things around here & have plans to knock out some smaller things soon.  I lost 35 pounds last year.  I’ll share with you what I did (and did NOT!) do to drop that weight.

The kitchen redo that has dragged on FOREVER is actually almost done!  We looovvvee the changes & I hope you will too!  You can see earlier kitchen posts here.

kitchen before and after


This boring wall in our entry will get stripes soon!

IMG_1802


(It already received some DIY Wainscoting love to cover that pink!)

The kids’ den has been painted & received a new light fixture.  It will also be sporting stripes soon!  Yeah, I’m a little in love with stripes since I did that wall in the garage & in our half bath.  Chevrons?  Ummm, not ready to make that leap on a wall yet.  Speaking of the half bath, it looks like it’s time to show the updates on that, too!  Wow!  I am BE.HIND.

And then, it’s almost time for Valentorture!  Yeah, I still call it that.  If you are ahead of the game and already working on that, you can check out some cute Valentine’s Day boxes and a pennant banner here.

It’s Monday, so I’m off to knock out errands.  Come back & visit soon!


Summery DIY Tablecloth

Standard
Summery DIY Tablecloth

Ever had some super cute fabric that you just looved, but couldn’t figure out what in the world to with it?  I’ve had this adorable flip flop fabric forever, but just couldn’t find the perfect project for it.

IMG_2761

As I sat looking at our boring well-used patio table, it came to me.  A tablecloth.  We eat outside A LOT during the spring and summer and for some reason I just really hate to wipe down that table.  The answer – a tablecloth.  We’ve used vinyl tablecloths some in the past, but they too have to be wiped down.  Which is what I’m trying to avoid.  Then I started using some flat sheets, folded in 1/2.  It solved the wiping down issue (throw it in the wash), but wasn’t very cute.  But NOW, I could do cute!

So, I grabbed my tape measure & zipped back out to measure the table.  (That counted as my workout for the day, because the tape measure was in the craft room on the 2nd floor.) 🙂  I measured the diameter of the table & headed back up to measure my fabric.  I had just enough.  To mark the fabric, I first folded it in half, then measured the length and found the center.  Then I stuck a safety pin through my tape measure and pinned it through the fold at the center.  That allowed me to simply move the tape in a semi-circle around the folded fabric and mark the outline of my tablecloth.

IMG_2519IMG_2520

Problem.  My fabric was a little narrow.  So, I had to cut it smaller than I wanted, but I figured I could fix that with a border.  Once the fabric was marked & cut, I was ready to use some scrap fabric for the border.  All I needed was the circumference so I would know how much fabric I neeeded, right?  Umm…..I’ve been out of school for a while….and math was never my strong suit.  How do you figure the circumference??!!  No worries, all 3 of our kids received letters saying they qualified for advanced math classes this next school year.  “I’ll ask them”, said the lazy brilliant mom.  “Hey, girls!”  “Yeah?”  “What’s the formula to figure the circumference of a circle?”…….dead silence……  “Girls?”……”Hello?”…….  So, I had to start calling them by name and asking them as individuals.  “I don’t know.”  “Oh, gee, um, well, I think it’s …”  “It could be….Pie R Squared?”  Ooookaaayyyy.  Glad their daddy is a math wiz & can help with homework this year!  So, I went online & got the formula (2PIr).  Taking that number, I was able to figure the length of border fabric I needed.

**Just, please, remember to cut your border fabric LONGER than necessary.  Especially if you have my mad measuring skills!**

I wanted the border about 2 inches wide, so I cut my scrap into 2 1/2 inch strips for seam allowance.  Then, I pinned the devil out of it.  Seriously, when you are putting a straight strip of fabric on a circle, use every last pin you can find!

IMG_2760

I pinned, and pinned, and pinned, and …… ran out of fabric.  Great.  THAT is why you cut your strips LONGER than you think you need.  So I grabbed another piece of border scrap, and cut another strip.  I just stuck it on the sewing machine to join it to the other strip & then continued pinning.  Once it was all pinned.  Aaaalllll the way around, I realized I had not hemmed it.  Which is best done BEFORE attaching the border to the circle.  So I UNpinned it.  Gggrrrrr…  Then I decided I didn’t want to hem it, because that was a pain.

Solution…………..2″ wide navy blue ribbon & fabric glue.  I had plenty.  Right?

IMG_2766  IMG_2767

Yeah, the mad measuring skills kicked in & I ended up with a frantic run to Hobby Lobby the next morning for navy ribbon.  They had one roll left.  One.  Thank you, Lord for caring about the small things.

Once all was glued on & REpinned to the circle, I ran it through on a straight stitch.  That’s pretty close to the extent of my awesome sewing abilities.  And here is how my summery tablecloth looks on our well-used table –

IMG_2842

You’d think I would have taken the pic from an angle that did NOT include the seam, but oh well.  It’s fun & it saves me from having to wipe the table.

Now to do something with the rest of the deck!

Garage Organization

Standard

Welcome, friends!  I hope everyone had a fabulous 4th!  It’s been rainy here, so we did some inside things – including going to see Despicable Me 2.  Loved it!  It’s not as good as the first one, but you just have to love those minions!

The last few months have been project laden.  I know  you can’t really tell due to the lack of posts, but I really have been busy!  My favorite project of all is my newly painted & organized paint supply wall.  I.LOVE.IT!!

I’m the primary painter here & the paint supplies had been tossed on the old (badly slanted) wire shelves haphazardly, as well as scattered in a couple of other places for the 8 years we have lived here.  It was such a pain to try to find everything when I was ready to paint something.  Which is fairly often.  So, I decided enough was enough.

Here’s a semi-before because I forgot to take an actual before.  Sorry.

IMG_2352


All that’s really missing is the piles of paint supplies and old, cobweb covered antlers that hubs is saving.  For some reason.

IMG_2503

This wall is on my side of the garage & I just REALLY wanted to do something fun and funky.  Stripes kept coming to mind, so I decided to try that.  I used a tape measure and chose random stripe widths.  To keep the lines straight, I used a level and a yard stick.   We had multiple sample jars of paint from various projects, as well as old pegboard and left over adjustable shelving tracks and shelves, so I didn’t have to buy anything for this project.  Yay!!

Here is my fun, funky, organized “after”:

IMG_2845


I still need to label the bins, but the sides are clear so I know what’s in them until I get around to doing labels.  It is SOOO much easier to locate my supplies now!  I love it!!  It makes me smile every time I pull into the garage.


DIY Wainscoting

Standard

Doin’ a little happy dance because the 1986 country rose wallpaper in our entry is GONE!  Well, it’s still there, but you can’t see it.  Finally.  Allow me to share a “before”….  This is the view from the front door looking towards the kitchen.  The second pic is a close-up of the wallpaper that I do not miss one bit.

HPIM1331    IMG_2085

After spending waaaayyy too much time on Pinterest and multiple blogs, we settled on doing basic DIY wainscoting.  The main reason is that we wanted it to match the dining room (now office) so that it looked like it had always been there.  I am SO very thankful for my handy engineer husband!  He actually enjoys math and figuring out angles – both of which were majorly needed for this project.  (A point he made sure the girls knew since they all hate math.)  🙂

The first thing we had to do was fix all the wallpaper seams, because we were not going to cover the paper with MDF.  Adding anything over the paper would have increased the depth & we would have needed to remove the existing chair rail to accommodate that.  We wanted to avoid the headache, time and expense incurred by doing that.  So, we (actually hubs) trimmed back each seam and then mudded over it with sheetrock mud.  It took a couple of coats to make it all flat and even.  Then we primed with interior latex primer so our paint would adhere to the nasty wallpaper.

IMG_2097   IMG_2102

We used painter’s tape to mark off the boxes so we could see how they would fit on the wall.  Once we were happy with the size & placement of the rectangles, it was time to work on angles.  Hubs went online and printed off a protractor.  He used that to build a couple of jigs.  Everything was cut on the table saw.  I REALLY wish I had taken pics of the jigs and the templates he cut!!  But, **sigh** I didn’t.  He cut a piece of 1/4″ plywood to the size he wanted.  In this case 4″ wide so all the boxes and angles would be 4″ from the trim and we wouldn’t have to measure every.single.time.  Then he cut that into the correct angles needed so we could make the trim pieces fit.  Some construction adhesive (that didn’t work too well) and a nail gun were the tools we used to put up the trim.  I painted it to in a gloss to match the existing trim.  I LOVE our entry now!  It is SO much better!

IMG_2225  IMG_2224

IMG_2223

The next step is to hire a painter to come paint the 2-story high walls above the chair rail in the entry.  They will be Realist Beige like everything else to keep it simple.  I’m not about to put my hubby on scaffolding over the stairs to paint!

I think I promised at the beginning of this blog to put measurements of the rooms.  Not sure I’ve held to that, but I’ll do it here.  This entry is shaped like a “T”.  The top of the “T” (front door wall) is 145 1/4″ long & 56″ wide.  At the base of the stairs is a little piece that is 31 3/8″.  Going up the stairs is 174 3/4″.  The wall directly in front of the front door is 63 3/8″.  The walls on each side of the leg of the “t” (going in to Kitchen) are 129 5/8″ long and it is 39″ wide.  The chair rail is 34″ from floor.

Hopefully all that makes sense!  If you are considering DIY wainscoting, just Google “DIY Wainscoting” and you will get some great pictures and some blogs that actually give step-by-step direction.  I just picked a picture I liked, printed it and asked hubs to make it happen.  He loves it when I do that…..  🙂